
Before + After: Warm Springs Grass to Garden
With the warmer weather we’ve been having, I’ve been wrapping up some installations. Once the irrigation is in and we plant some seeds, my clients get really excited about all that their garden will bring them. Today, I wanted to show you a transformation from start to finish for all of you looking at your backyards and wishing for a kitchen garden.

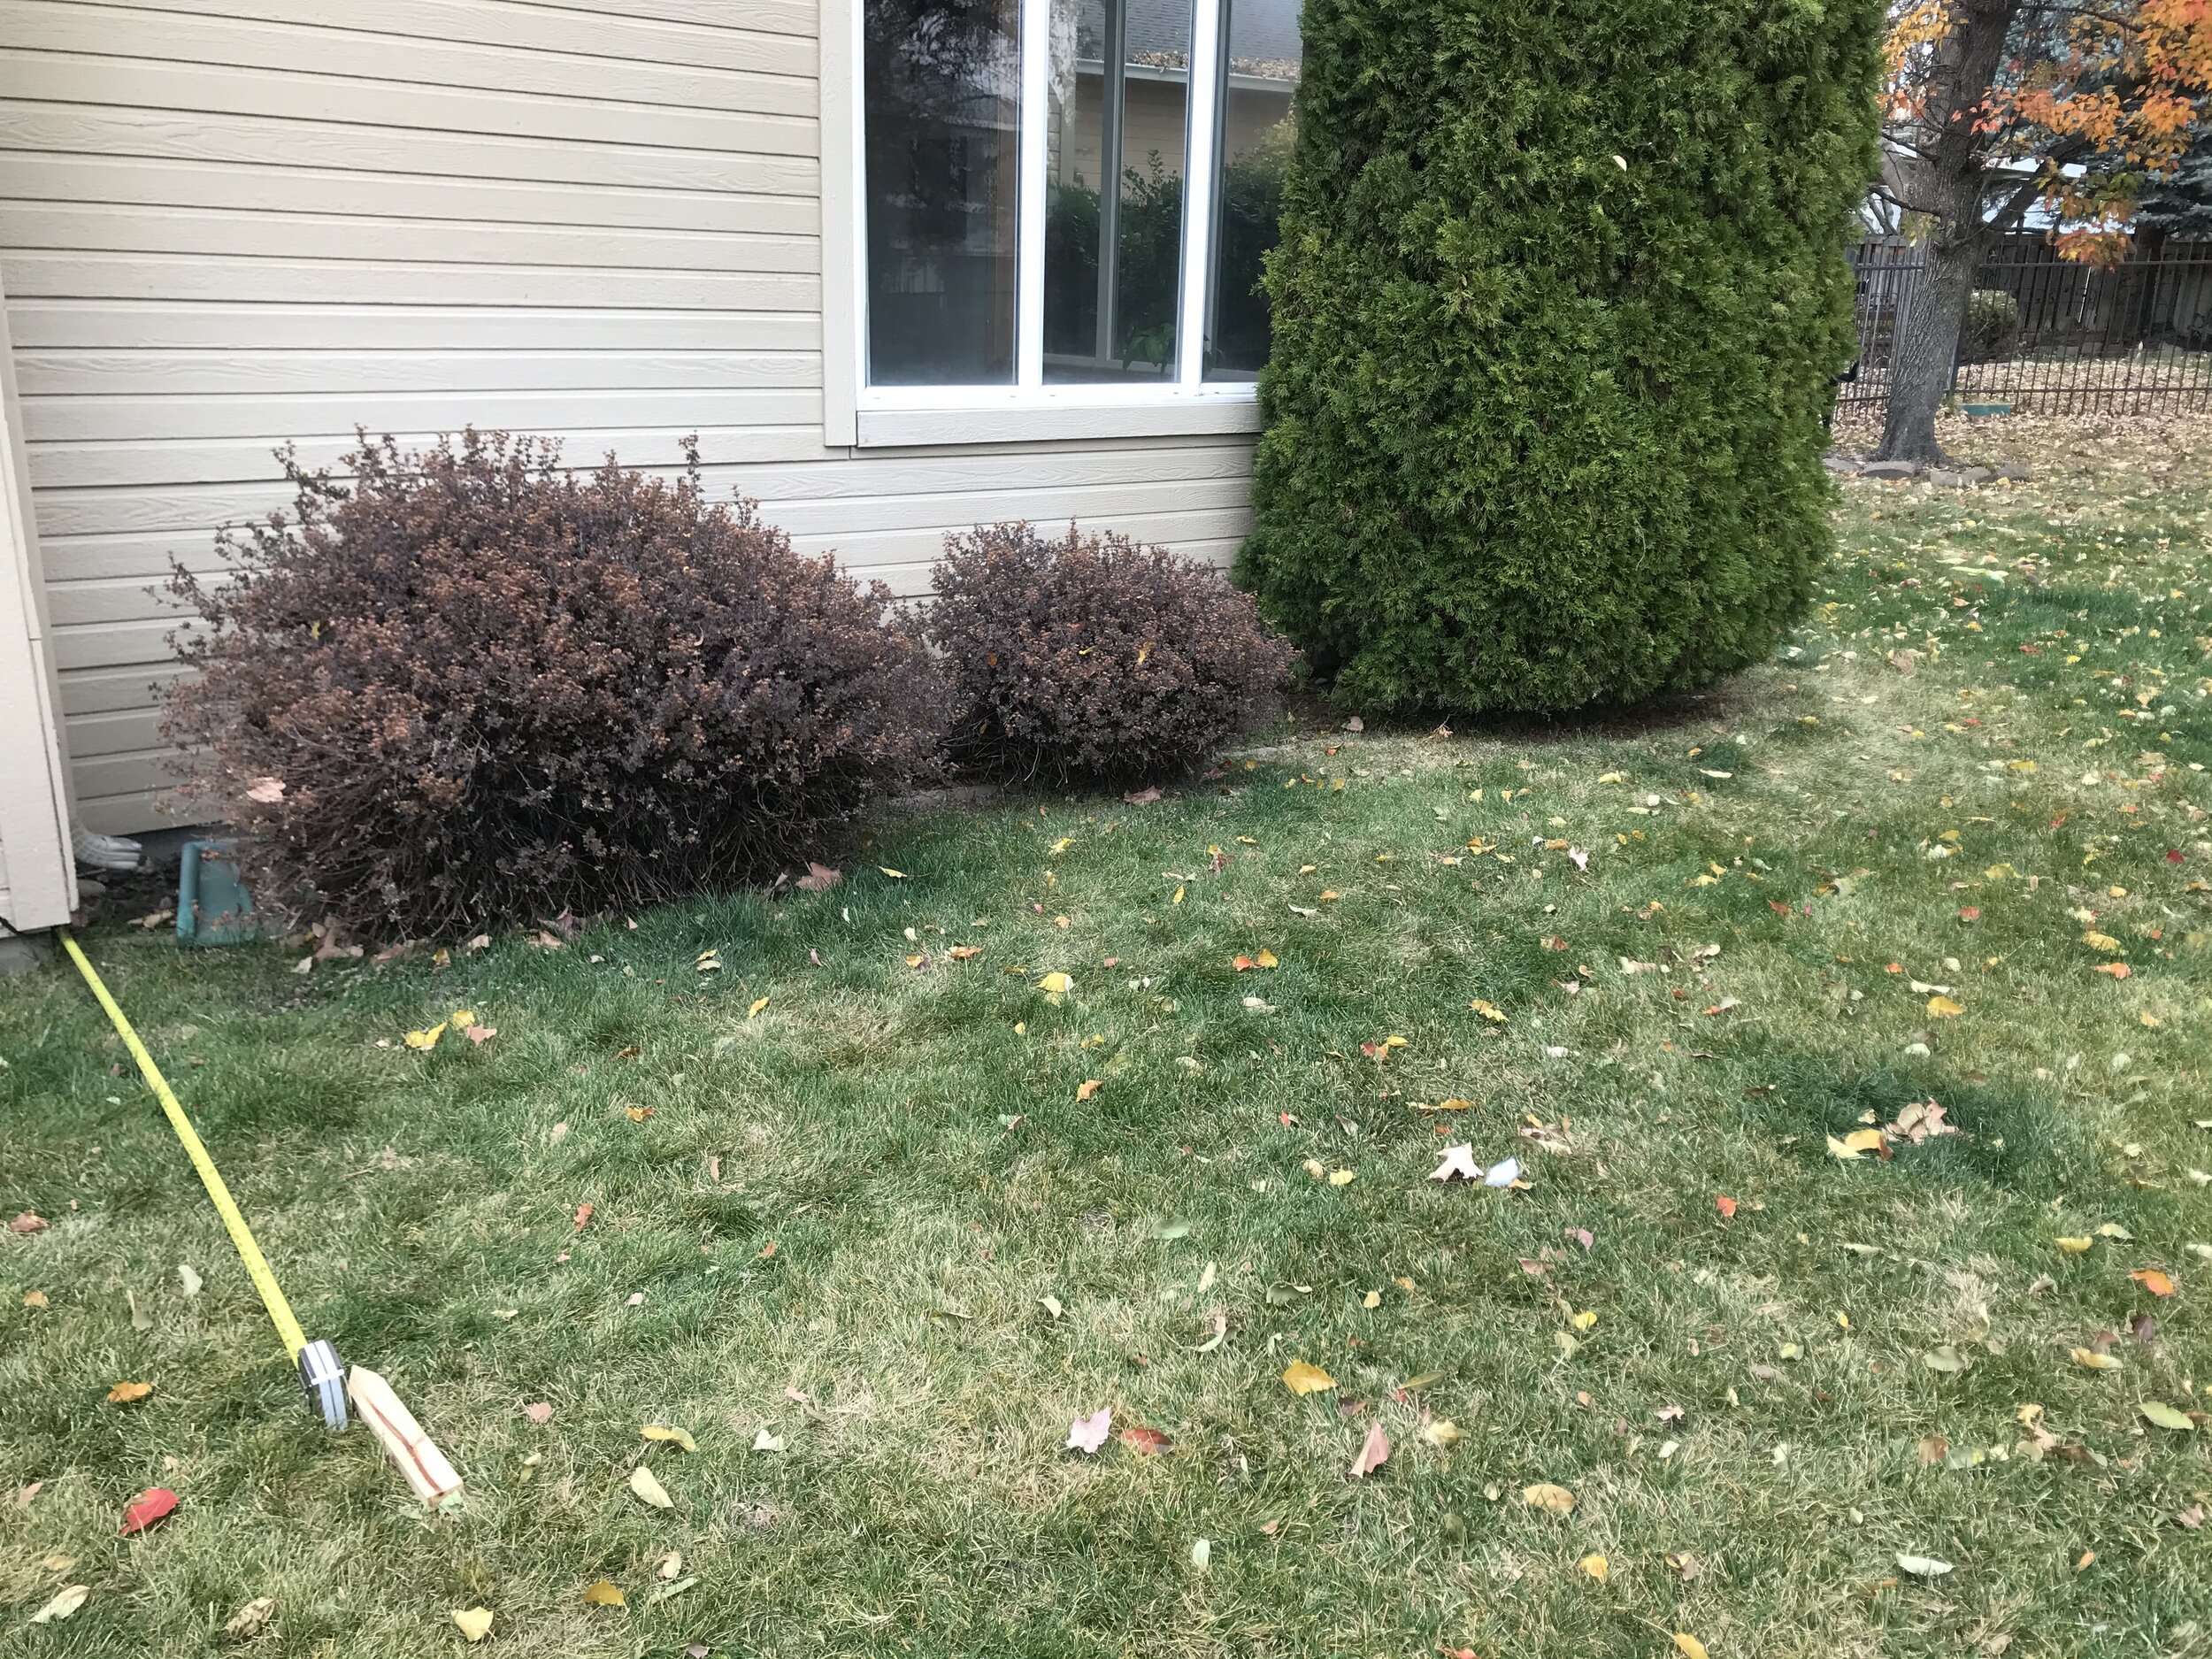
This fall, my clients called me over to create a design for their backyard kitchen garden. They had just recently moved in and had loved having a garden in their previous home. Their yard was smaller there, and they grew tomatoes in their alley area. Their new backyard is massive and a great place for their black lab and one year old to play, but they weren’t sure where to place a garden.
We walked around the back and front yards, talking about sun, water and space, and ultimately decided that this part of the yard was the best location. They weren’t crazy about the bushes, and we talked about how a vertical trellis could cool that side of the house. They’re a family who spends a lot of time in their kitchen and back patio, and the garden was just beside it.
Once we had discussed the garden design and location, we talked through their budget for a garden. Their previous garden was small and definitely a DIY project, but this one would be larger. They still wanted to DIY some of the elements, so we opted for a concierge-style kitchen garden package.
My concierge kitchen gardens allow clients to prepare the space on their own, removing any sod, leveling the area, laying the landscape fabric or cardboard and installing the gravel. When that step is complete, I deliver the raised beds, soil mixture, trellis and plants, and we plant the beds together. This is an excellent option for those who love a DIY project but want the best possible materials without having to do all the research. Most of my clients opt for the turnkey service, but I love offering concierge kitchen gardens to those who want to be part of the whole process.

Speaking of process, this was step one. My clients removed the bushes, edging and sod in the garden space and worked to level the area as much as possible. It looks better already! From there, they laid landscape fabric across the area and added in some edging to hold the gravel in.

The raised beds were ready faster than anticipated, so we set them in the area while we waited for the gravel and soil to arrive.

From there, things came together very quickly. There’s nothing like a giant pile of dirt on the driveway to motivate some gardeners! My clients filled the beds and placed the trellis and gravel within a couple of weekends. This week, the irrigation goes in and so do some early seasons seeds. Here’s another look at this transformation.
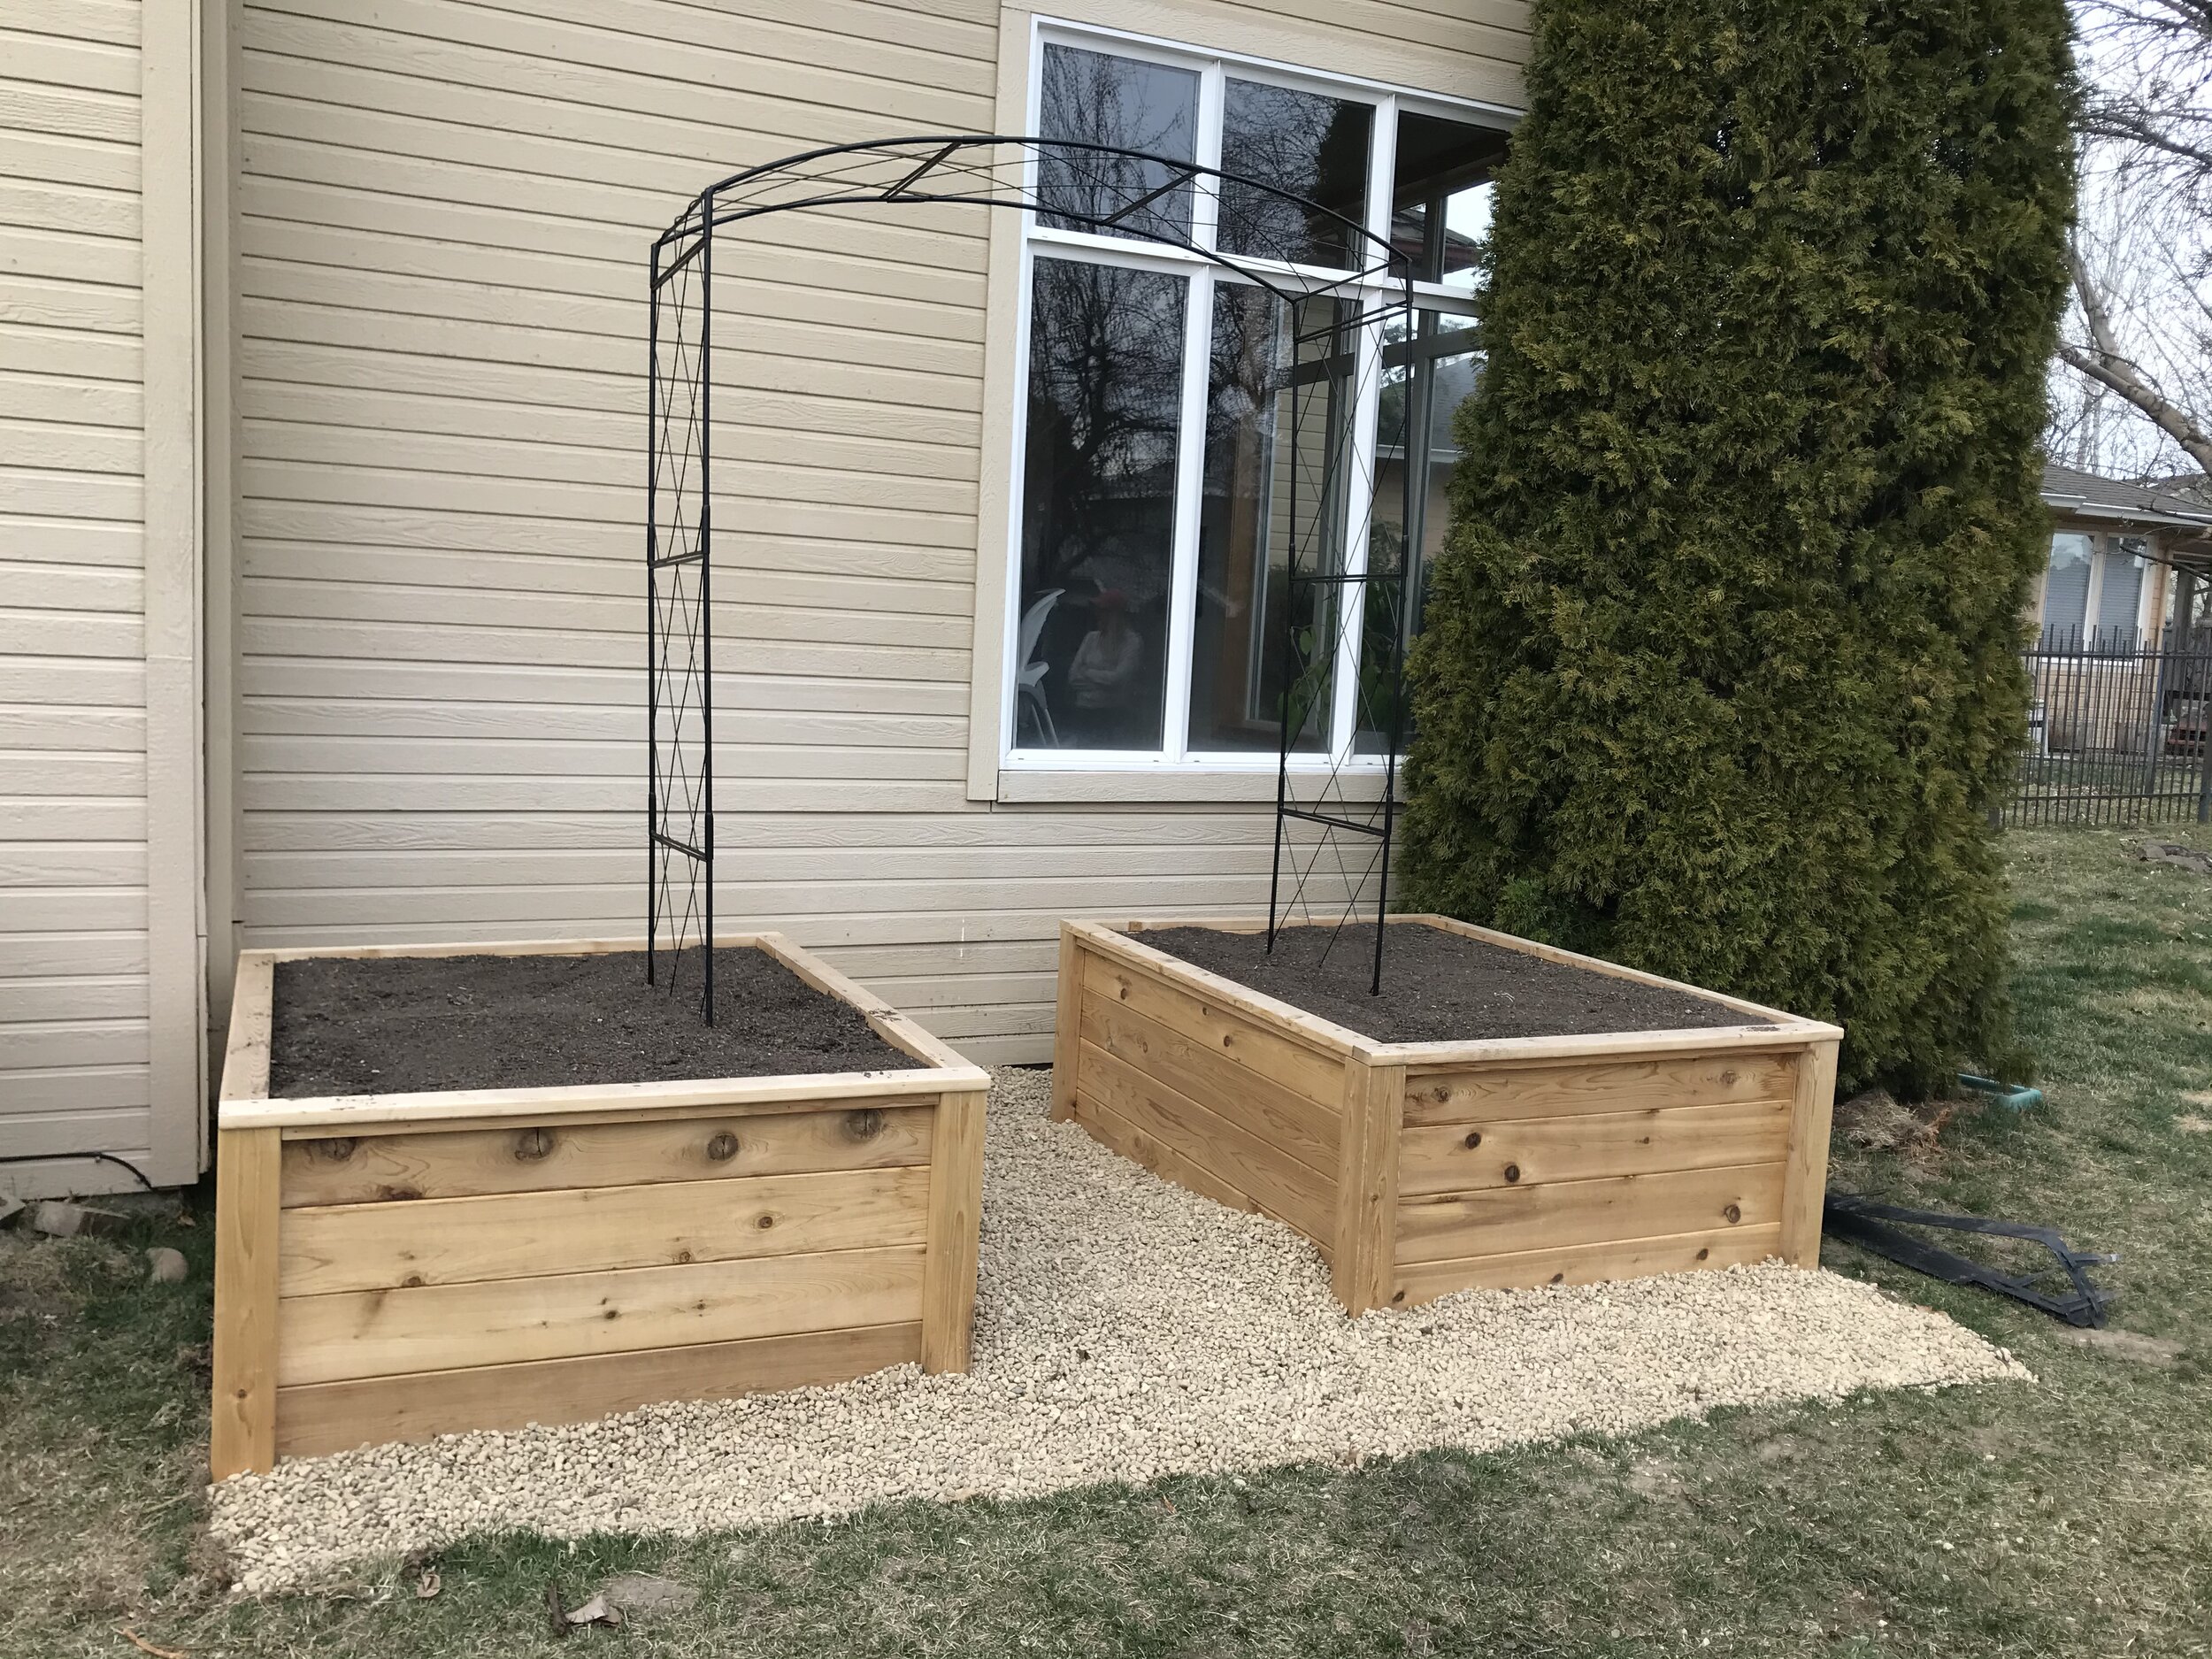
I can already see the peas that will climb that trellis in just a few weeks and the winter squash that will dangle from the arch. I’ll update this post with images as the growing season progresses.
In the meantime, is there a spot in your backyard that is calling to you for a garden? Let’s talk it over and decide the best path forward for your space and goals. Click below to set it up.